Car Design - from sketch to 3D animation
As an Industrial Designer student, it seemed fantastic to me to become a car designer. In the final year of my studies, I got to work on my graduation project at SpykerCars.
This year, I am taking things a step further. I am designing a car again, but this time the exterior, chassis, and suspension of a car. At SpykerCars, there are technicians and mechanics around whom I can ask about things. However, I am carrying out this assignment within the walls of our studio, where no automotive technicians are present. I am responsible for the preliminary research, design, and execution in 3D.
The Assignment
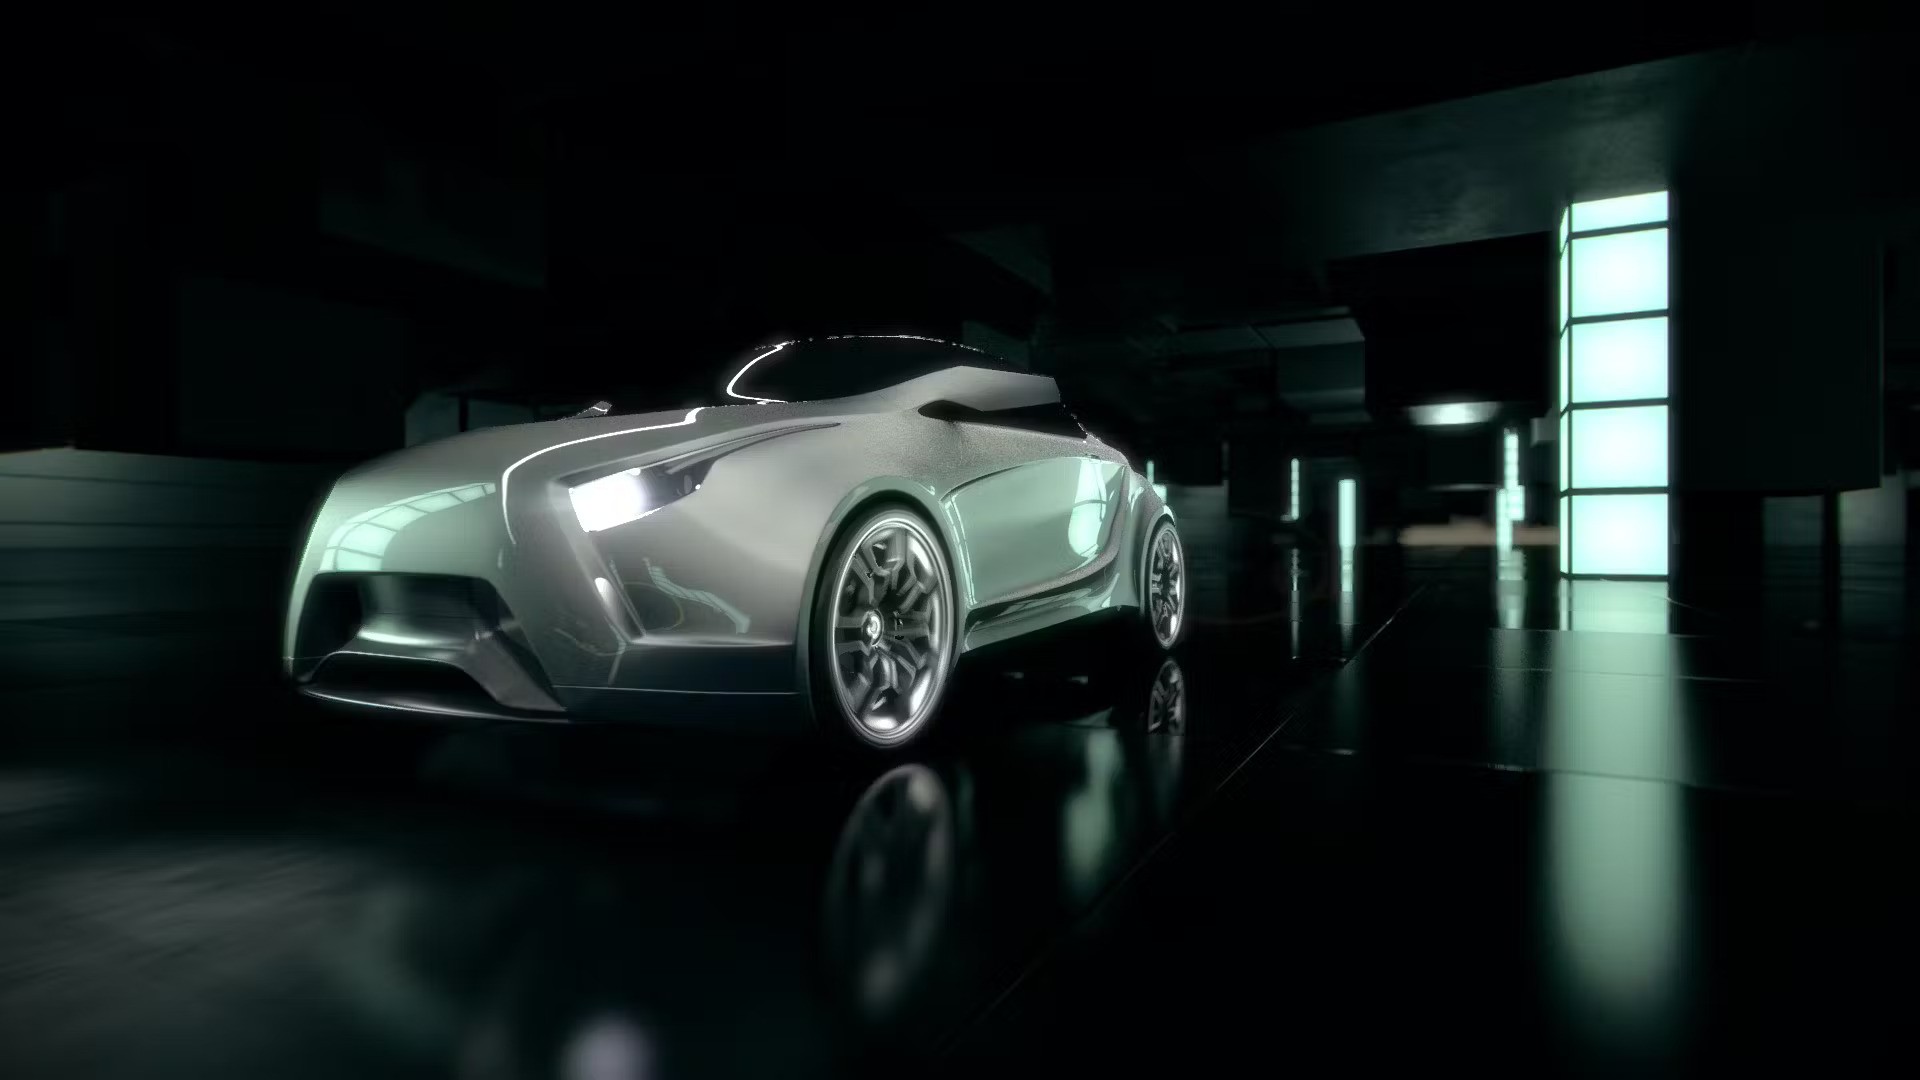
The question came from Royal TenCate to C4Real to design a car. This car will be used in a 3D animated film that we are developing for them. With the help of this film, Royal TenCate wants to present their new carbon 'TenCate Cetex' in the automotive industry. They do not want to be affiliated with a brand, so it is my task to design a representative, sporty car that conveys a sustainable feel.

Step-by-step Design
In the design process, I went through eight steps;
1 – Reference Material – Since I do not have dismantled cars at work, unlike my situation at Spyker, I have to rely on my camera and the internet. Taking photos and collecting numerous interesting designs, both of the exterior and components 'under the hood,' provides me with a solid foundation for the rest of the design process.
2 – Pencil and Paper – Simply sketching by hand still works excellently for me. Initially, I only put down a play of lines. I sketch shapes that appeal to me and create as many different designs as possible to avoid getting stuck on one idea. During this phase, I like to exaggerate a bit in my design to give it more character, but overdoing it too much can make the car look cartoony. Good proportions are key here.

3 – Credibility – In this case, the car will not actually go into production, but it must still be visually correct. Technically, the design does not have to be exact. However, characteristic components must be integrated in a credible manner. Think of the placement of air intakes, wheels, or character lines. A too-short wheelbase makes the car unstable, and if character lines are incorrectly placed, the model will need to be made from plastic because otherwise, it would be impossible to produce.
4 – Correct Shapes – Before the sketches are further detailed, I sketch my chosen design from as many angles as possible. Skipping this phase can cause significant problems later. A sketch shown at an angle from the front with a lot of perspective may look cool, but it does not convey anything about the shape's progression to the back. When the car is later rendered in 3D, all shapes must fit in 3D space.

5 – Detailing – Now that the design is broadly established, it's time to add some details. Adding the right details makes the design much more credible. Think of handles, indicators, and brake discs. This is also the moment when I switch to digital sketching. Rendering reflections and the details in the headlights completes the sketches. This also presents a much nicer look for the client.
6 – From 2D to 3D – With the sketches from different views, I have enough information to start in my 3D software. Modeling the design is a time-consuming process. Moreover, bridging 2D to 3D is an exciting yet daunting phase. On the one hand, I find it fascinating to see my 2D design in 3D, but on the other hand, a 2D design in 3D can sometimes be quite disappointing. In this case, the shape works excellently in 3D, and after a week of modeling, the design stands in 3D.

7 – Physics! – Now that the model is ready, the driving behavior of the car can be simulated. It takes some searching for the right values. But when the car tears through the corner for the first time, sinks through its suspension, and tries to maintain grip, the design truly comes to life.
8 – Sleeping – To leave the production of the rest of the parts in the animated film aside for the moment, after a good 5 weeks of work, the film is fully rendered as a film file on my desktop. I have executed a fantastic project with a very ambitious deadline. It was all worth it, but I could use a few good nights of sleep now.